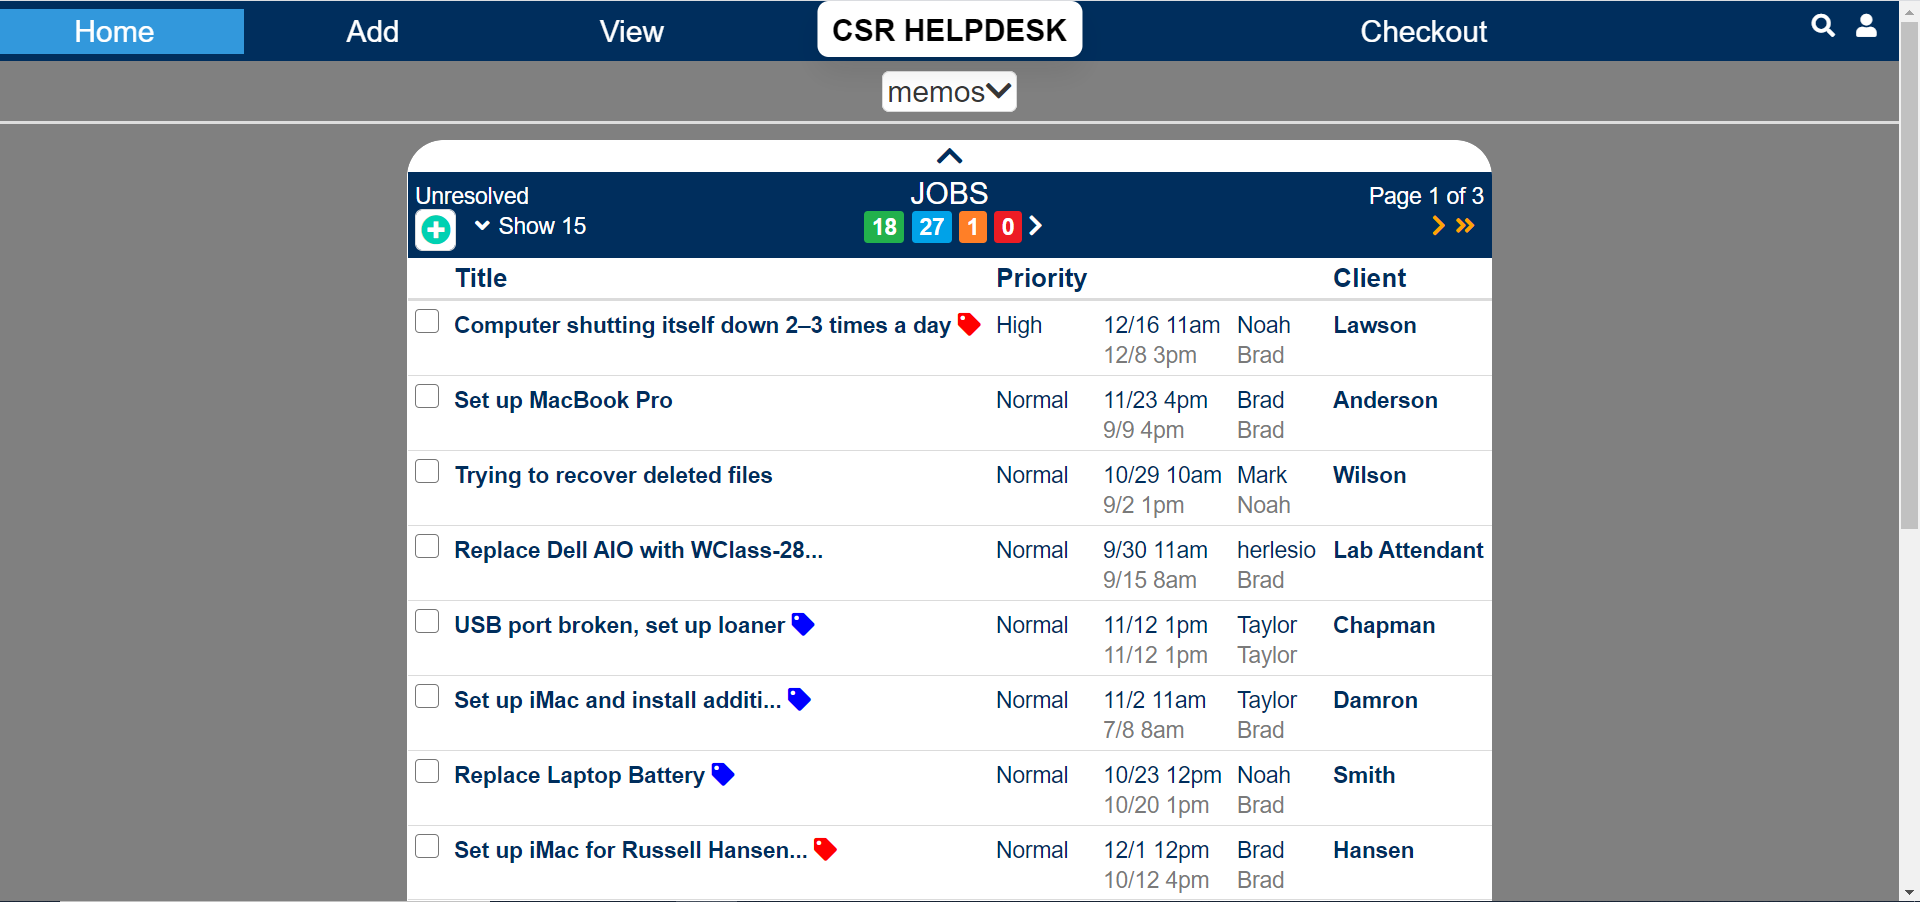
Go to humhelp@byu.edu, and if you are not already logged in to the CAS system, log in with your netID and password. You will be redirected to a page that looks like this:
Creating a Job
Usually, all new jobs that are for setting up new devices will be put in the system by Brad, so you do not need to worry about them. But if a professor calls or emails or comes in with a job that cannot be completed right then, then you need to create a job for it so it can be documented and resolved.
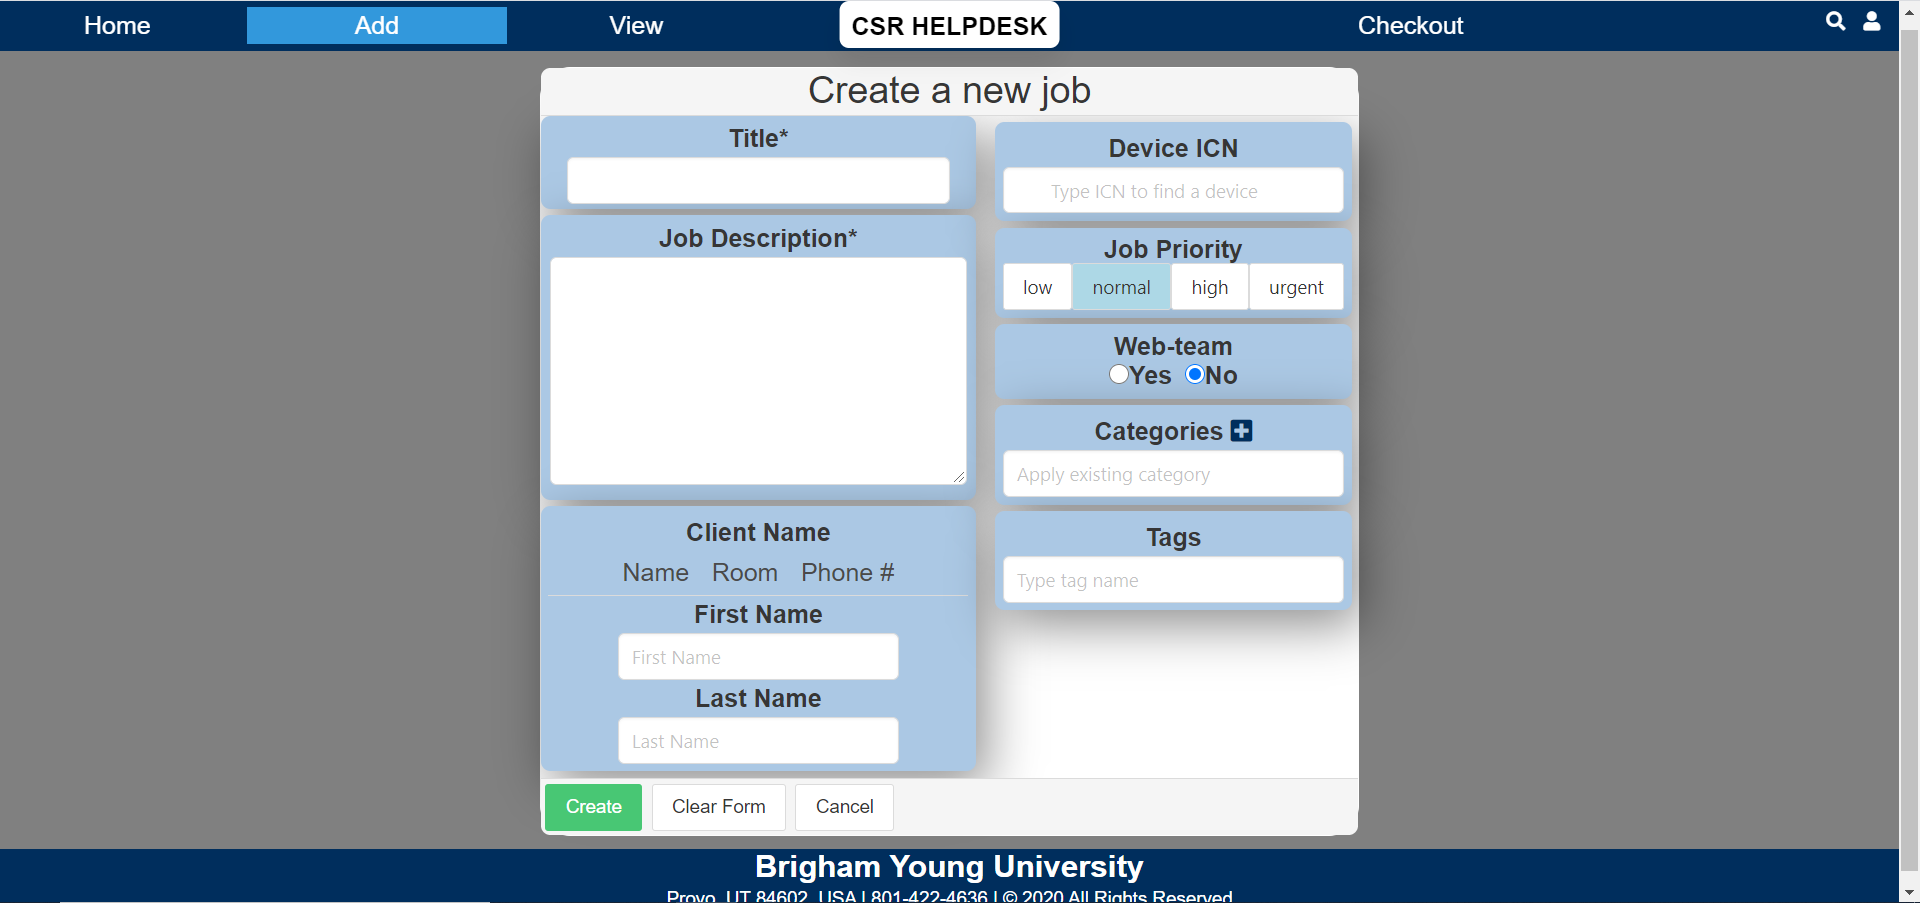
To create a job, click the “Add” button on the top panel, then click “Jobs.” You should see a screen like this:

Add a Title that describes the job simply like “Needs Help With Outlook” or “Computer Needs to Go to CougarTech.” If the job needs to be done on a certain day, add the day or date in brackets before the title. Like “[WED] USB Port Broken, Set Up Loaner” or “[Jan 15th] Deliver iPad to Office.” In the job description, outline the more specific details like what exactly needs to be done and what you have already tried.
Fill in the First and Last name of the professor you are working with, as soon as you start typing it will search the database and you can click their name in the drop down menu. You can also search them by their room# or phone#.
Leave the ICN box empty unless it is important to know exactly which device this job is for. Job Priority is almost always Normal, unless it is a job that must be done soon, then mark it as High or Urgent.
Leave the Web Team as “No” and the Categories and Tags empty unless you need to mark the job as something. Hit the green Create button at the bottom and you are all set to go. The job will be highlighted for a few days on the main page because it is new.
Commenting on a Job
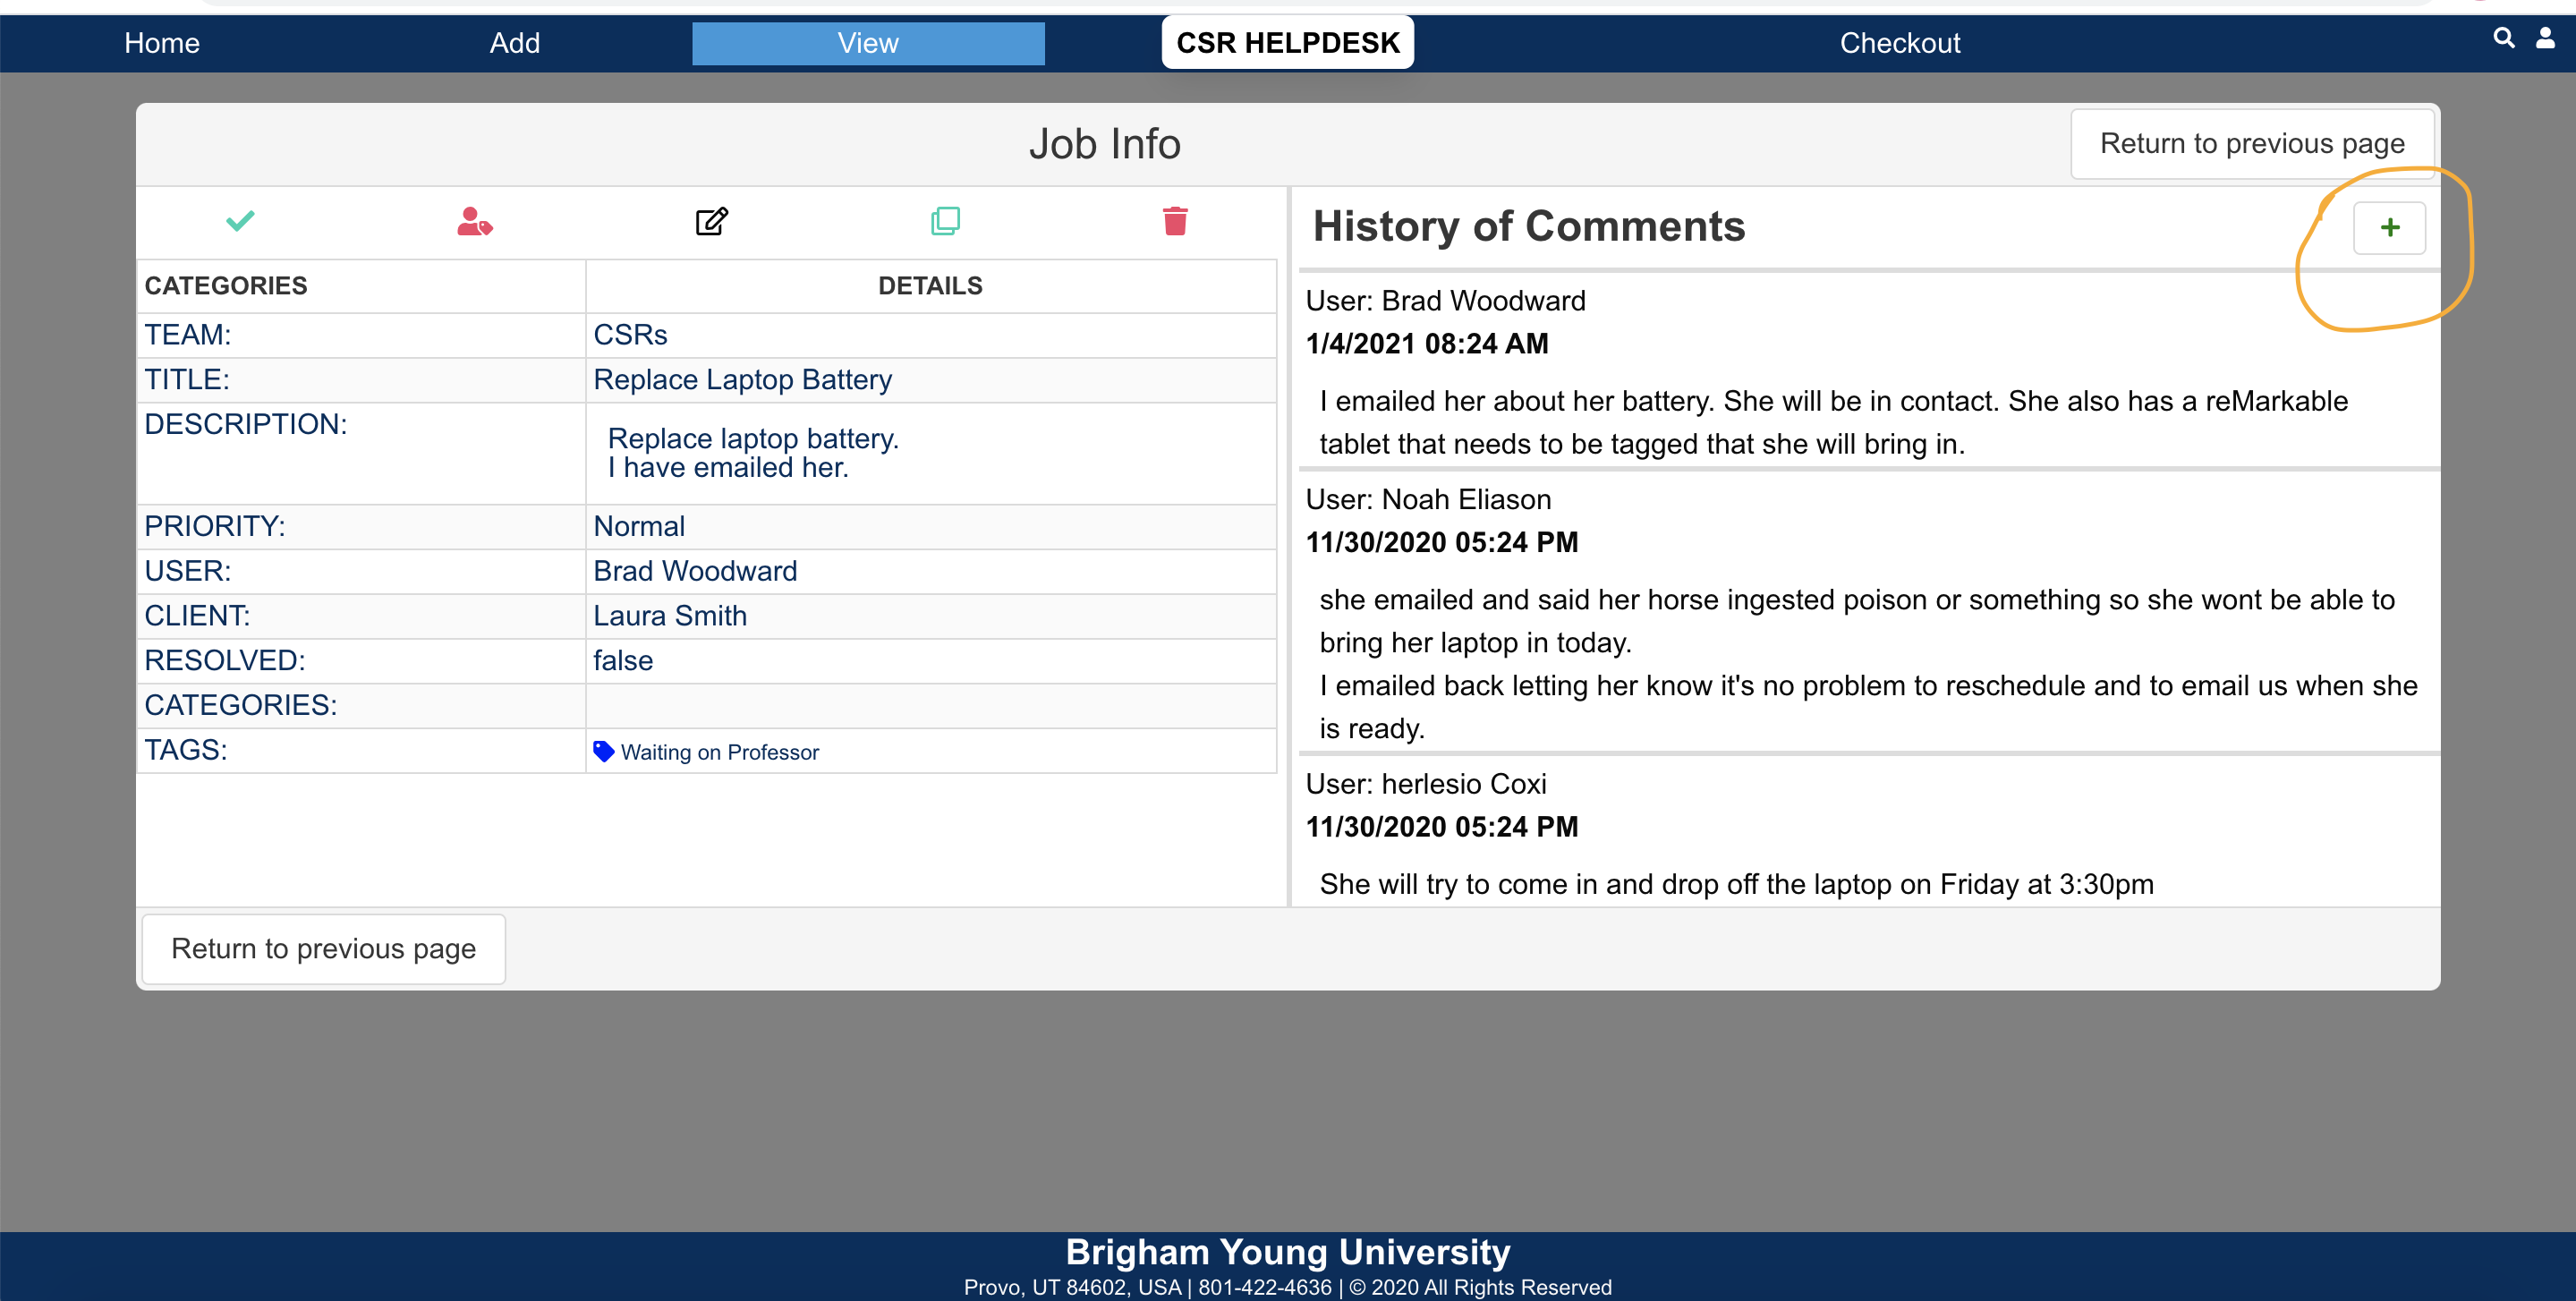
Whenever you have been working on a job, or have completed it, it needs to be recorded in the job through comments. Especially when you are leaving for the day, make sure to document what you have done so others can pick up where you have left off. Make your comments concise but easy enough to read so that your co-workers can understand what still needs to be done.
Add comments by clicking the Plus button in the top right corner of any job:

Creating a Client
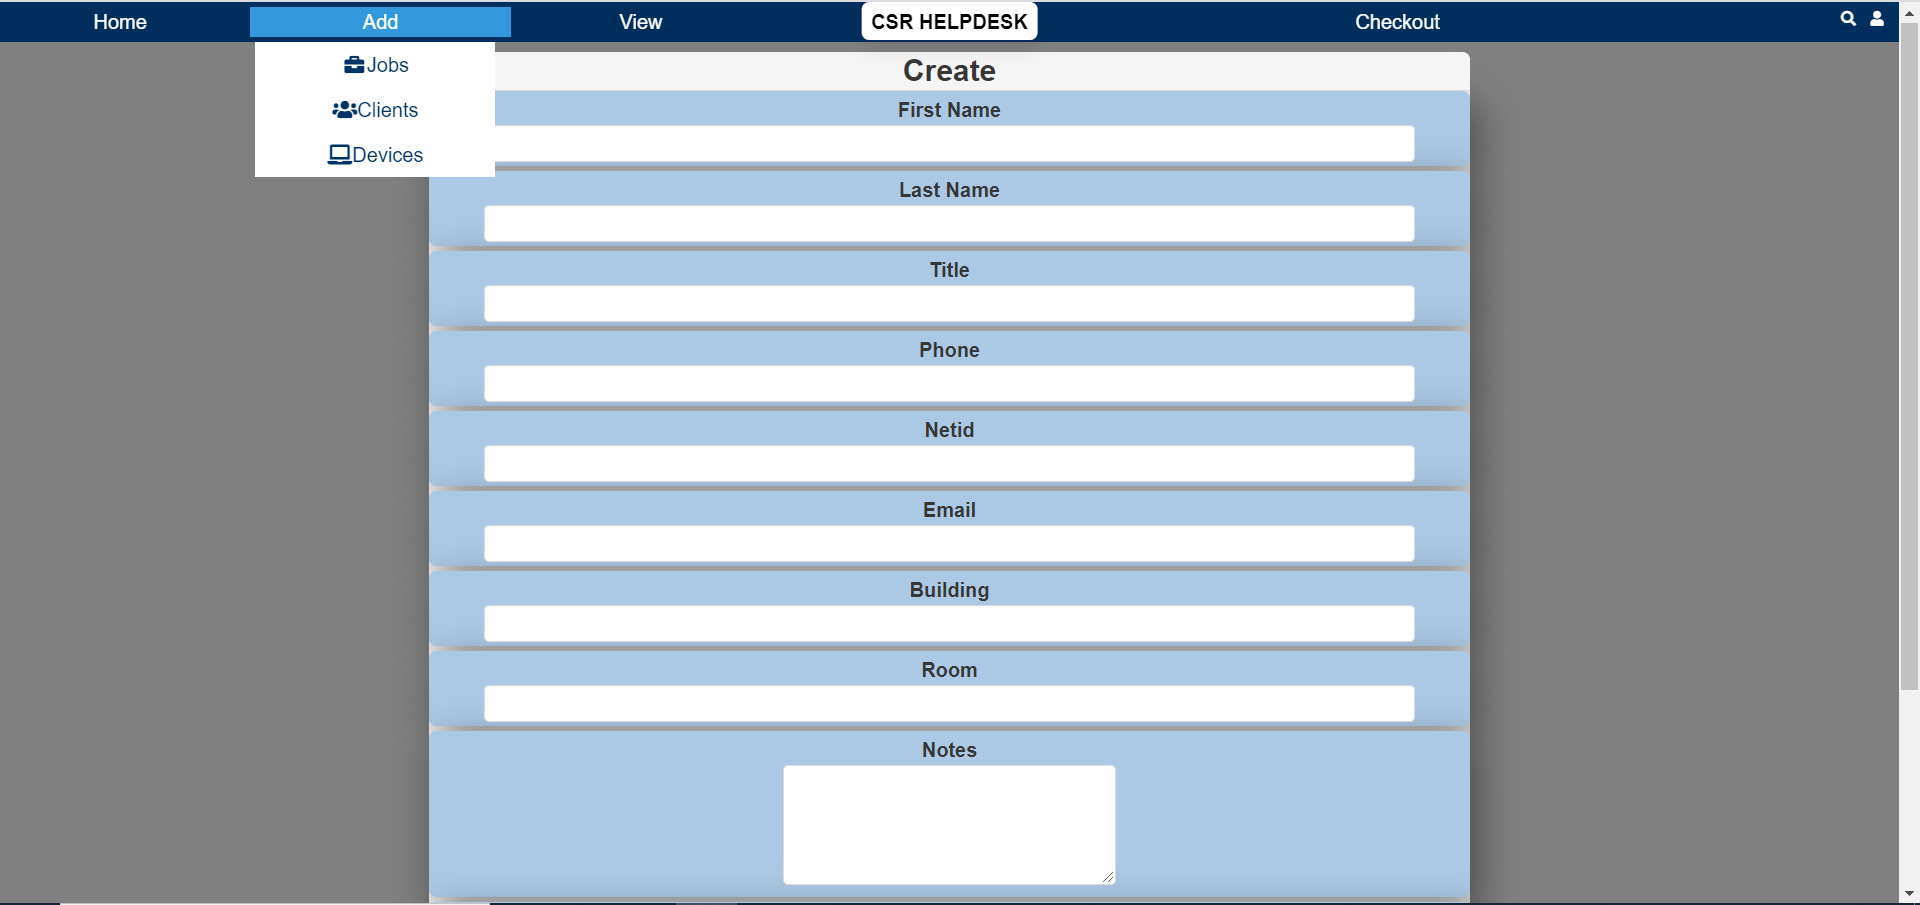
You only need to do this if there is a new professor that just got hired. Most professor should already be in the system. Also, Adjuncts are not in the system by name, so search them by room or phone number instead. But if you need to add a Client, click “Add” at the top bar and then “Client.”
Fill out their information. Title is usually left empty unless they prefer Dr. or Mr. or something. try to get their netID as well if you can. If not you can search for it on the crashplan website as well. Leave the notes and tags empty. Make sure to put them in the right Department by clicking it at the bottom of the screen. Click Save Client and you are done.
Adding a Device
The easiest way to do this (especially when you are setting up a new computer for a professor) is to click on the client you are adding a device to, then click the little computer symbol in the top bar. It will say “Add device to this client” if you hover over it.
Now follow the directions for adding a device outlined in the Windows Imaging Document (https://humcsr.byu.edu/2017/03/03/setting-up-a-new-windows-computer/).
Checking Out Devices


