Process for replacing the old N-Computing thin clients with the new Atrust clients.
Tools needed: medium-sized Philips head screwdriver; medium-sized flathead screwdriver; small pliers.
- Disconnect all cables from the old device.
- Unmount the N-Computing device. They are a bit tricky to remove from the mounting bracket. Try rotating the case clockwise and tugging firmly to remove.
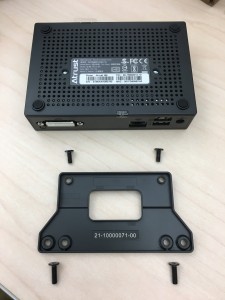
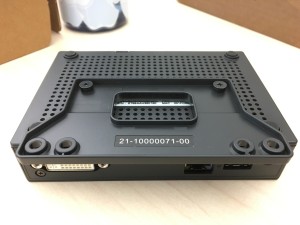
- Screw the mounting bracket onto the Atrust device. Best way to mount is long dimension vertical, with video port on the same side as the video port of the monitor.
Note: In the plastic bag with the mounting bracket is a smaller plastic bag with 4 small screws and 2 longer ones. The small screws are to attach the bracket to the client, the long ones are to attach the bracket to the monitor. (There will be 2 small screws left over)


- Reconnect all the cables, including ethernet, video cable with DVI adapter, power cable, and USB cables (keyboard, mouse, and extender).
- Boot the Atrust device. You should see the generic login screen.
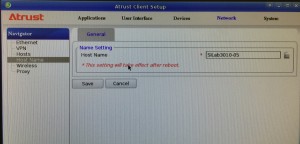
- Click the Settings cog in the lower lefthand corner. Choose Network, then Host Name.
- Enter the hostname for the station you are installing. The naming convention is SILab<room number>-<station number>. See example below:

- Notify Mark Wilson Sr. when you have completed a room or group so he can push out the boot up profile to the new devices.
